

To use professional graphic design software, start by understanding the basics. Knowing the tools and features will help you create stunning designs.
Graphic design software can seem daunting at first. The many options and tools may overwhelm beginners. But, with some guidance, you can learn to navigate these programs. Whether you are designing logos, brochures, or social media graphics, mastering the software is crucial.
This guide will help you get started. We will explore essential features and tips for beginners. By the end, you will feel more comfortable using professional graphic design software. Ready to dive in? Let’s explore the world of digital design together.
Choosing The Right Software
Choosing the right software is crucial for your success in graphic design. With so many options available, selecting the best one can be overwhelming. Different software offers unique features and tools tailored to various design needs. This guide will help you make an informed decision by exploring popular options and key factors to consider.
Popular Options
Several graphic design applications are widely used by professionals and beginners alike. Each has its strengths and specific use cases. Here are some of the most popular options:
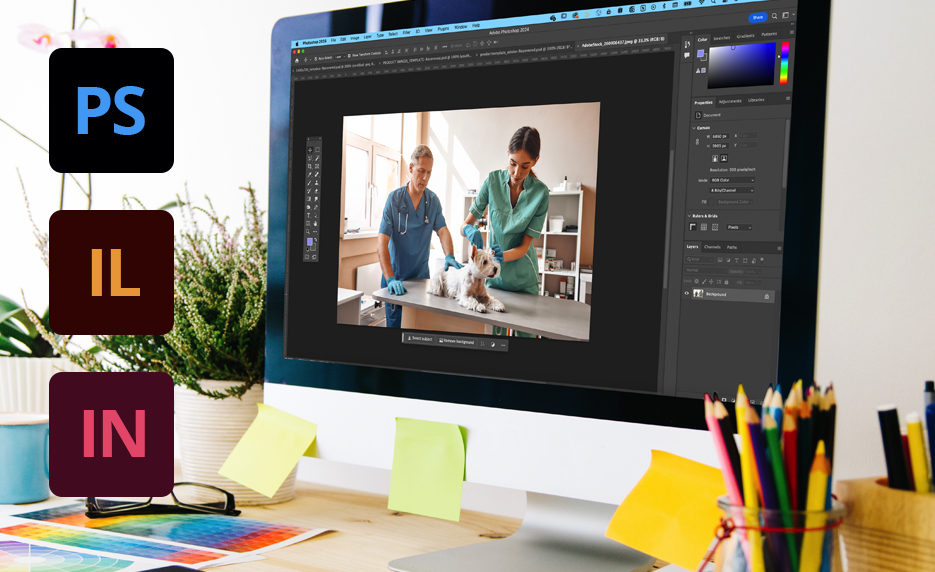
- Adobe Photoshop: Known for its photo editing software capabilities, Photoshop is a versatile tool for creating detailed raster graphics.
- Adobe Illustrator: This is a leading vector graphics software, perfect for creating logos, icons, and illustrations.
- CorelDRAW: Another excellent vector graphics software, CorelDRAW is user-friendly and packed with features for professional designers.
- Sketch: Popular among UI/UX designers, Sketch is great for user interface design and prototyping.
- GIMP: A free alternative to Photoshop, GIMP offers robust photo editing software features.
- Canva: Ideal for beginners, Canva simplifies the design project workflow with its drag-and-drop interface and pre-made templates.
Each of these tools has design software tutorials available online to help you get started. Choosing the right one depends on your specific needs and the type of projects you plan to work on.
Factors To Consider
When selecting a professional design program, several factors should guide your decision. Here are some key considerations:
- Purpose: Identify your primary need. Are you focusing on digital art software, photo editing software, or vector graphics software? Choose a tool that excels in your area of interest.
- Skill Level: Some tools are more beginner-friendly, while others offer advanced features for professionals. Ensure the graphic design tools you pick match your experience level.
- Budget: Costs can vary widely. Adobe products, for instance, require a subscription, whereas GIMP is free. Balance your budget with the features you need.
- Compatibility: Check if the software is compatible with your operating system. Some tools like Sketch are macOS-exclusive.
- Support and Tutorials: Look for software with ample design software tutorials and a supportive community. This can ease your learning curve significantly.
- Integration: Consider how the software integrates with other tools in your design project workflow. Seamless integration can boost your productivity.
Here is a quick comparison table to help you decide:
| Software | Primary Use | Cost | Skill Level |
|---|---|---|---|
| Adobe Photoshop | Photo Editing | Subscription | Intermediate/Advanced |
| Adobe Illustrator | Vector Graphics | Subscription | Intermediate/Advanced |
| CorelDRAW | Vector Graphics | One-time Purchase | Beginner/Intermediate |
| Sketch | UI/UX Design | Subscription | Intermediate/Advanced |
| GIMP | Photo Editing | Free | Beginner/Intermediate |
| Canva | General Design | Freemium | Beginner |
Consider these factors and use this comparison to choose the best graphic design application for your needs. The right software will enhance your graphic design techniques and streamline your creative process.

Credit: www.flatworldsolutions.com
Getting Started
Getting started with professional graphic design software can be exciting yet overwhelming. This software offers powerful tools and features to bring your creative ideas to life. To make your journey smoother, we’ll guide you through the basics. Let’s dive into the installation process and user interface essentials.
Installation Tips
Installing professional graphic design software is straightforward if you follow some key steps. A proper installation ensures that the software runs smoothly on your system. Here are some tips:
- Check System Requirements: Before downloading, ensure your computer meets the minimum system requirements. This information is usually available on the official website.
- Download from Official Sources: Always download the software from the official website to avoid malware. Look for a “Software Installation Guide” on the site.
- Follow Installation Prompts: Double-click the installer file and follow the on-screen instructions. Make sure to read each step carefully.
- Restart Your Computer: After installation, restart your computer to complete the setup. This helps to integrate the software with your system properly.
If you encounter any issues during installation, refer to the troubleshooting section in the “Graphic Design Tutorials” or the software’s help section. Here’s a quick table summarizing the steps:
| Step | Description |
|---|---|
| Check Requirements | Ensure your system meets the software needs. |
| Download Software | Get the installer from the official website. |
| Install | Run the installer and follow instructions. |
| Restart | Reboot your computer to finalize setup. |
User Interface Basics
Understanding the user interface (UI) is crucial for using professional design applications effectively. Here’s a breakdown:
Menu Bar: Located at the top, the menu bar provides access to file options, editing tools, and software settings. Familiarize yourself with each menu to navigate easily.
Toolbars: Toolbars contain essential tools for your digital design workflows. Common tools include selection, brush, text, and shape tools. Hover over each icon to see its function.
Canvas/Workspace: This is where you create your designs. The canvas is the main area where your visual communication tools come to life. You can zoom in and out to focus on details.
Panels: Panels provide additional options and settings for the selected tool. Common panels include layers, colors, and properties. You can dock, move, or hide panels as needed.
Here’s a list of common UI elements in most graphic design tools:
- Menu Bar
- Toolbars
- Canvas/Workspace
- Panels
Each software may have a slightly different layout, but the basic elements remain the same. Check the “Graphic Design Techniques” section in the software’s help guide for more details. Familiarizing yourself with these elements will enhance your efficiency and creativity.
Essential Tools And Features
Professional graphic design software offers a range of essential tools and features that cater to both beginners and experts. These tools help in creating stunning visuals, editing photos, and designing engaging layouts. By understanding and utilizing these key features, you can elevate your design projects and work more efficiently.
Drawing Tools
Drawing tools are fundamental in any graphic design software. They allow you to create shapes, lines, and complex illustrations from scratch. Here are some essential drawing tools you should know:
- Pencil Tool: This tool lets you draw freehand shapes and lines. It’s perfect for sketching and creating organic forms.
- Pen Tool: Ideal for creating precise vector graphics. You can use anchor points and handles to create smooth curves and straight lines.
- Brush Tool: This tool mimics the effect of a paintbrush. You can adjust the brush size, hardness, and opacity to achieve different effects.
- Shape Tools: These tools allow you to create basic geometric shapes like rectangles, circles, and polygons. They are useful for layout design and creating structured compositions.
- Eraser Tool: Use this tool to remove unwanted parts of your drawing. It’s essential for refining your work and ensuring clean edges.
Many graphic design software also offer advanced drawing features:
| Feature | Description |
|---|---|
| Pathfinder | Combines and divides shapes to create complex designs. |
| Layers | Organizes your artwork into manageable sections. |
| Blend Tool | Creates smooth color transitions between objects. |
Using these tools effectively will enhance your digital illustration skills and make your design process smoother.
Text And Typography
Text and typography are crucial elements in graphic design. They help convey your message and add aesthetic value to your work. Here are some key typography tools and features:
- Text Tool: This tool allows you to add text to your design. You can choose from a variety of fonts and customize the size, color, and alignment.
- Character Panel: Adjust individual character properties like font style, size, kerning, and leading.
- Paragraph Panel: Control paragraph settings such as alignment, indentation, and line spacing.
- Type on a Path Tool: This lets you place text along a drawn path or shape. It’s useful for creating unique text effects.
- Font Libraries: Access a wide range of fonts, including both standard and creative typography.
Advanced typography techniques include:
- Kerning: Adjusting the space between individual characters to improve readability.
- Leading: Controlling the vertical space between lines of text.
- Tracking: Uniformly adjusting the spacing across a range of characters.
Understanding these typography techniques can make your text more impactful and engaging. Effective use of text and typography tools can significantly enhance your layout design and overall visual communication.
Creating Your First Project
Professional graphic design software can seem overwhelming at first. But with the right guidance, creating your first project becomes an exciting journey. This guide covers the essentials of setting up a canvas and using templates to create stunning visuals efficiently.
Setting Up A Canvas
Before diving into your project, start with the Canvas Setup Guide. Setting up your canvas correctly ensures your design fits its intended use.
Here are some steps to follow:
- Open your software: Launch the professional design application you’re using.
- Create a new file: Navigate to ‘File’ and select ‘New’. This opens a new project window.
- Define dimensions: Set the width and height according to your project needs. Typical dimensions include:
| Project Type | Recommended Dimensions (px) |
|---|---|
| Social Media Post | 1080 x 1080 |
| Website Banner | 1920 x 600 |
| Print Poster | 2550 x 3300 |
Choosing the right dimensions is crucial for your design’s clarity and impact.
Next, set the resolution. For web projects, 72 DPI is standard. For print, 300 DPI ensures high quality. Adjust the color mode based on your project: RGB for digital and CMYK for print.
Consider the background. You can select a solid color, gradient, or even a transparent background, depending on your design needs.
Once your canvas is set, save your project. This prevents losing your initial setup. Now you are ready to start your creative design projects with a properly prepared canvas.
Using Templates
Templates simplify your design process. They offer a starting point, saving time and ensuring professional results.
Here’s how to use templates effectively:
- Access templates: Most professional design applications provide built-in templates. Find them under ‘File’ > ‘New from Template’.
- Select a template: Choose one that fits your project. Categories often include social media, web, print, and more.
- Customize the template: Modify text, images, and colors to match your brand or project requirements.
Graphic design templates are especially useful for beginners. They provide a structure, helping you focus on content rather than layout. Here are some advantages:
| Advantage | Details |
|---|---|
| Time-saving | Pre-made layouts reduce setup time. |
| Consistency | Ensures a uniform look across projects. |
| Inspiration | Sparks creative ideas and strategies. |
Remember to explore and experiment. Each template can be a learning tool, teaching you new design techniques and user interface design principles.
Using templates is a smart way to enhance your visual communication strategies. They help you create polished and professional designs effortlessly. Don’t hesitate to explore various templates and adapt them to your unique style.
Design Techniques
Professional graphic design software offers a myriad of tools and techniques to create stunning visuals. Understanding the core design techniques is essential for leveraging these tools effectively. Let’s dive into two fundamental aspects of design: Color Theory and Composition Principles.
Color Theory
Color theory is crucial in graphic design. It helps in creating visually appealing and effective designs. Knowing how to use colors can make your designs stand out.
Here are some key points about color theory in graphic design:
- Color Wheel: The color wheel is a tool that shows the relationship between colors. It includes primary, secondary, and tertiary colors.
- Color Palettes: Creating a color palette involves choosing a set of colors that work well together. Use color palettes to maintain consistency in your designs.
- Contrast: High contrast between colors can make elements stand out. Use contrast to draw attention to important parts of your design.
- Complementary Colors: These are colors opposite each other on the color wheel. They create a vibrant look when used together.
- Analogous Colors: These are colors next to each other on the color wheel. They create a harmonious and pleasing design.
Using color theory in digital art creation and image editing software can enhance the visual impact of your work. Color can convey mood, highlight important information, and improve the overall user experience in your designs. Experiment with different color combinations and see how they affect your design.
Composition Principles
Composition principles help in arranging elements in a design effectively. Good composition ensures that your design is balanced and visually appealing.
Here are some fundamental composition principles:
- Balance: Balance refers to the distribution of elements in a design. Symmetrical balance is where elements are evenly distributed. Asymmetrical balance uses different elements to create a balanced composition.
- Hierarchy: Hierarchy helps in guiding the viewer’s eye to the important parts of the design. Use size, color, and placement to establish a visual hierarchy.
- Alignment: Proper alignment of elements creates order and organization in a design. Align elements to a grid or a specific line to maintain consistency.
- Repetition: Repetition reinforces a design by creating a sense of unity. Repeat colors, shapes, or patterns to create cohesion.
- Proximity: Group related items together to create a connection between them. Proximity helps in organizing information clearly.
Applying these composition principles in creative software applications and graphic design tools can greatly improve your design workflow. Effective composition ensures that your message is communicated clearly and efficiently. Practice these principles to enhance your visual communication skills.
Working With Layers
Professional graphic design software offers a wide array of features to enhance your creative projects. One essential aspect is working with layers. Layers allow you to organize, manipulate, and refine different elements of your design without affecting others. This makes your workflow more efficient and your designs more flexible.
Layer Management
Effective layer management is crucial for organized and efficient design workflows. In creative software applications like Adobe Photoshop or Illustrator, layers are like transparent sheets stacked on top of each other. Each layer can contain different design elements such as vector graphics, images, or text.
Here are some key points to consider:
- Naming Layers: Always name your layers descriptively. This helps you quickly identify and select the right layer.
- Grouping Layers: Group related layers to keep your workspace tidy. This is particularly useful for complex projects.
- Locking Layers: Lock layers that you do not want to accidentally move or edit. This ensures the integrity of your design.
- Layer Visibility: Toggle the visibility of layers to focus on specific parts of your design. This is useful for making detailed adjustments.
| Action | Shortcut |
|---|---|
| Create New Layer | Ctrl + Shift + N (Windows) / Command + Shift + N (Mac) |
| Duplicate Layer | Ctrl + J (Windows) / Command + J (Mac) |
| Group Layers | Ctrl + G (Windows) / Command + G (Mac) |
Utilize these tips and shortcuts to streamline your design workflows and keep your projects well-organized.
Effects And Adjustments
Applying effects and adjustments to your design layers can significantly enhance the visual appeal of your projects. Graphic design tools often include a range of image editing effects and color adjustments that can be applied non-destructively using layers.
Consider these common effects and adjustments:
- Blending Modes: These affect how layers interact with each other. Experiment with different modes to achieve various visual effects.
- Layer Styles: Add shadows, glows, or emboss effects to give depth and dimension to your elements. These can be edited at any time.
- Adjustment Layers: Use these for non-destructive color adjustments like brightness, contrast, and hue changes. Adjustment layers affect all layers beneath them.
- Masking: Masks allow you to hide portions of a layer without deleting them. This is useful for creating seamless composites.
Below is a table summarizing some adjustment layers:
| Adjustment | Purpose |
|---|---|
| Brightness/Contrast | Adjusts the overall lightness and contrast of the image. |
| Hue/Saturation | Changes the color and intensity of the colors in the image. |
| Levels | Adjusts the brightness levels and contrast using a histogram. |
By understanding and utilizing these effects and adjustments, you can bring a higher level of polish and professionalism to your graphic design projects. Experiment with different techniques to see what works best for your unique style and needs.
Exporting Your Work
Using professional graphic design software can be a game-changer for creating stunning visuals. One key aspect is knowing how to export your work correctly. Exporting ensures your designs are ready for various uses, whether on the web or in print. Let’s dive into the details of exporting your work efficiently.
File Formats
Understanding the right file formats is crucial for exporting your work. Different formats serve different purposes, and knowing which one to choose can save you time and ensure high-quality results.
Here’s a quick overview of common design file formats:
- JPEG: Ideal for web use. It offers good quality with smaller file sizes. Not suitable for images with text.
- PNG: Supports transparency. Great for web graphics, logos, and icons. Maintains higher quality than JPEG.
- GIF: Best for simple animations. Limited color palette.
- SVG: Scalable Vector Graphics. Perfect for logos and icons. Maintains quality at any size.
- PDF: Versatile format for print. Preserves design elements and fonts.
- TIFF: High-resolution format for print. Large file sizes but excellent quality.
Using the right file format depends on whether you are optimizing for web or print. Vector images (SVG) are scalable and great for logos, while raster images (JPEG, PNG) are better for photos and detailed graphics.
Optimizing For Web And Print
Optimizing your designs for web and print involves different techniques. Each medium has unique requirements to ensure your graphics look their best.
- Use JPEG or PNG for images. Compress files to reduce loading times.
- Ensure images are at 72 DPI (dots per inch) for web resolution.
- Use SVG for icons and logos. They are lightweight and scalable.
- Use PDF or TIFF for high-quality prints. Ensure images are at 300 DPI.
- Maintain CMYK color mode for accurate color reproduction.
- Include bleed and crop marks for professional printing.
Following these graphic design principles ensures your work looks great, whether on a website or in a printed brochure. Utilizing professional design software tutorials can guide you through these processes, making it easier to achieve the desired results.
Remember, the right tools and techniques can make a significant difference. Explore different graphic design tools and software to find what works best for your needs.
Credit: careertraining.frontrange.edu
Resources And Tutorials
Learning how to use professional graphic design software can be both exciting and challenging. To make the process easier, many resources and tutorials are available. These tools can help you master user-friendly design software and professional design applications. This section will explore some valuable resources and tutorials that will help you get started.
Online Communities
Engaging with creative design communities is a great way to learn from others and improve your skills. These online communities provide support, share tips, and offer feedback. Here are some popular online communities for graphic designers:
- Behance: A platform where designers showcase their work, get feedback, and connect with other professionals.
- Dribbble: Another platform for sharing design work and getting insights from other designers.
- Reddit: Subreddits like r/graphic_design and r/design_critiques offer advice, tutorials, and discussions.
- Facebook Groups: Many groups are dedicated to different aspects of graphic design, from beginners to advanced professionals.
These communities often have forums, chat rooms, and groups where you can ask questions and share your work. They are excellent for finding graphic design resources and discovering new techniques.
Learning Platforms
Online design learning platforms offer structured courses and tutorials to help you master graphic design tools. Here are some popular learning platforms:
| Platform | Features | Courses Offered |
|---|---|---|
| Udemy | Wide range of courses, affordable prices, lifetime access | Graphic Design Courses, Software For Graphic Designers |
| LinkedIn Learning | Professional instructors, downloadable resources, certificates | Design Software Tutorials, Graphic Design Tools |
| Skillshare | Subscription model, community projects, feedback from peers | Digital Design Platforms, Graphic Design Resources |
| Coursera | University-level courses, accredited certificates, financial aid | Graphic Design Courses, Professional Design Applications |
These platforms provide access to experienced instructors and a wide variety of courses. Whether you are a beginner or looking to refine your skills, these online design learning platforms have something for everyone.

Credit: webflow.com
Frequently Asked Questions
What Is The Best Graphic Design Software?
The best graphic design software varies by needs. Adobe Photoshop and Illustrator are popular for professionals. They offer robust features and tools.
How Do I Start Using Graphic Design Software?
Begin with tutorials and practice regularly. Familiarize yourself with the software’s interface and tools. Experiment with simple projects.
Can Beginners Use Professional Graphic Design Software?
Yes, beginners can use professional graphic design software. Many programs offer tutorials and user-friendly interfaces. Start with basic features.
What Are The System Requirements For Graphic Design Software?
System requirements vary by software. Generally, a powerful CPU, sufficient RAM, and a good graphics card are needed. Check specific software requirements.
Conclusion
Learning professional graphic design software can feel challenging at first. With practice, it gets easier. Start with basic tools. Move to advanced features slowly. Experiment often to learn new tricks. Don’t fear making mistakes. They help you grow. Use online resources and tutorials.
They offer great help. Always save your work often. This avoids losing progress. Share your designs to get feedback. This improves your skills. Stay patient and keep practicing. Progress takes time. Happy designing!